|
|
|
|
|
|
THROUGH A LENS DIMLY LIFE
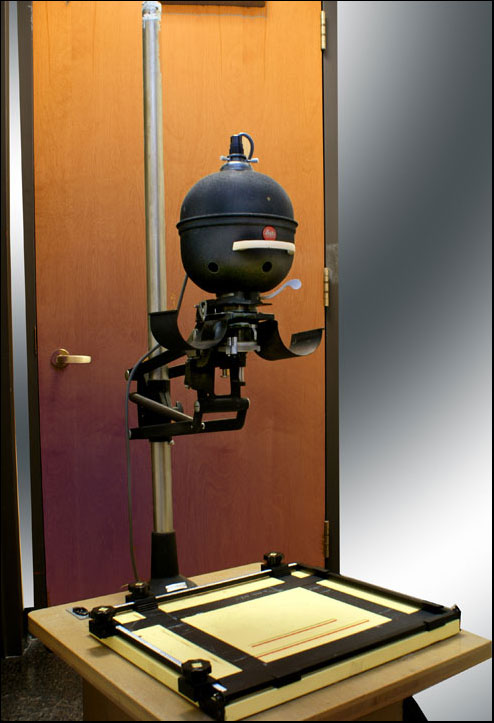
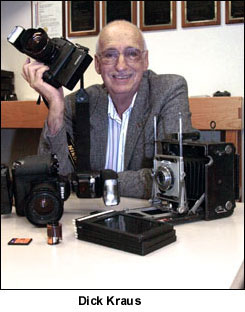
BEFORE DIGITAL (CONTINUED) To continue last month's topic, Life Before Digital, I would be remiss if I didn't include a foray into the wet darkrooms that were required to process and print the films of yore. It might be relevant to mention, here, that the seeds of my photographic career in photography were sown in a simple wet darkroom that was set up in the janitor's slop sink closet at Ludlum Elementary School in Hempstead, Long Island. When I was a 5th grade student, Principal Edgar B. Woodard started a camera club. We were asked to bring in some negatives from our family's box Brownies and we made contact prints in that tiny, improvised darkroom. When I saw my own, very first print begin to materialize in the dim yellow light, I was hooked for the rest of my life. Any of you over the age of, oh 30 or so, probably had wet darkrooms in your basements, just like mine. But, it wasn't until I got into photography on a full time basis (for me it started with 4 years in the Navy as a photographer) that the darkroom became an intragal part of my life. My professional career started with the 4x5 Speed Graphic. Last month's journal didn't mention it, but it was the press photographer's work horse until the early '60's.
As you can see, this is one big piece of machinery compared to today's 35mm cameras.
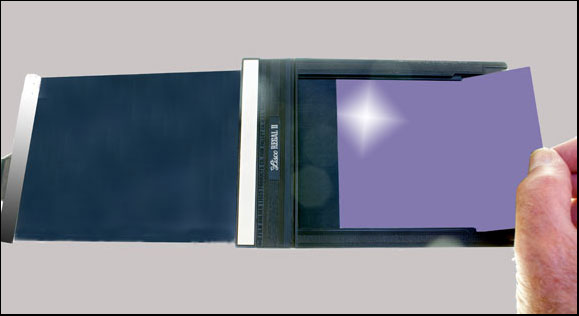
I mentioned last month, that the early versions of the 35mm cameras were very manual. There was no "auto this" or "auto that." Every adjustment had to be set by hand. Well, the Speed Graphic was more of the same but bigger, slower and more cumbersome. The photographer had to make sure that he/she had a decent supply of loaded holders before setting out on assignments. A holder was inserted into the spring pressure back and the dark slide was withdrawn. The Compure shutter on the lens had to be cocked, the shutter speed and aperature set, the camera focused on the subject with the rangefinder found on the right side of the camera and then you switched your eye over to the viewfinder to make your composition. We used the hand held exposure meters described last month, to ascertain the exposure, and perhaps used some of the flash equipment described in last month's journal. When we got back to the office, we went to the darkroom with our film holders. We would take the temperature of the developer and adjust it if need be. Then the lights would go out and in utter darkness, working by feel alone, we would remove the darkslide and remove the exposed film from each holder and insert them into metal developing hangers.
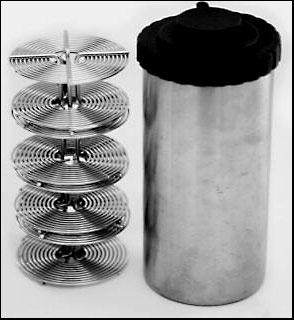
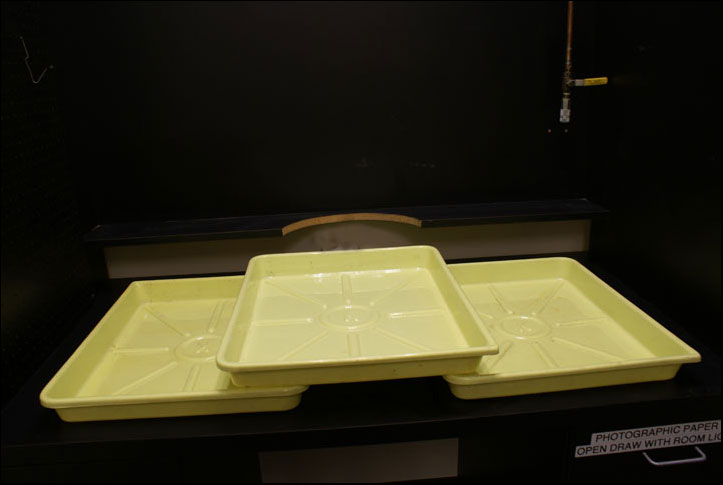
We would gather up the loaded hangers and grope for the developing tank into which we would deposit our film. We would have to lift the hangers out of the developer and drop them back in every 30 seconds to agitate the film to ensure even development. Then, when the timer announced the end of the developing cycle, the film would go into another tank of running water to rinse off excess developer after which the load would wind up in the fixer (hypo) tank. After the proper amount of fixing, the film would go into a wash water tank and then into a film dryer. While the film was being washed and dried, it was off to the typewriters to do captions. The processing took about twenty minutes. Caption writing might add time, depending on how many had to be written. At that point, at Newsday, we would go over our take with a Photo Editor and the selected fim was handed off to the print darkroom technicians. We rarely printed our own stuff.
That's how it was done in the "Good Old Days." But, would I like to return to those halcyon times? Nah. Not really. I like sitting at my computer. I can slip my digital camera card into my card reader and in seconds I can see my images. A little bit of image tweaking in Photoshop and I have exactly the image that I was looking for. A touch of a button later and in minutes I have a great looking 8.5 by 11 inch color print. There is no underlaying odor of darkroom chemicals and best of all, my fingers are no longer stained coffee brown from long immersions in caustic developers. Now, how great is that?
|
|||||||||||||||