Camera Corner
October 2002
Avid
Express DV 3.5
by
Marc Kermisch
|

|
When I found out
that I was going to get a chance to review Avid’s latest desktop
DV software, Express
DV 3.5, I was filled with anticipation. The day that my copy of
Express DV 3.5 arrived, I could not wait to get home and install the
software. All my hopes were high, especially since I am often forced
to work on both PC and MAC platforms, Avid’s latest software came
bundled with a version for both platforms. As I dug into my package
and lifted out (the very heavy) box of software, I was overcome with
excitement.
That excitement waned a bit
as I dug into the manuals that accompany the software. There are three
of them and each more in depth than the other. After fumbling around
and reading through all the requirements and recommendations of how
to configure your system, I popped the CD in and started the install
process. To my surprise, it was much easier than what the manuals had
laid out. After rebooting my computer, I double-clicked on my Avid Express
DV 3.5 desktop icon and waited for the software to load.
Getting
Started
Here comes my first issue with the latest version of DV 3.5, you are
required to have a USB dongle inserted into on of your USB ports at
all times when using the software. While I understand the need for Avid
to protect its intellectual property, I find it frustrating that I have
to permanently dedicate a USB port just to run the Avid software. While
this is a small issue, imagine how many of us would lose this dongle
when switching machines or inserting another device into the USB port
while performing another task.
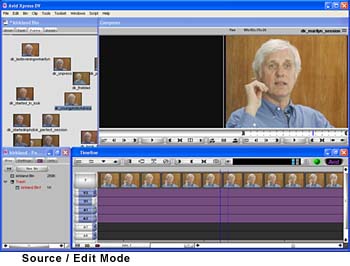
Once the application is launched
and you have set-up your first project, I suggest that you immediately
go to your Super Bin and configure all of your settings. A quick word
about the super bin, this window allows you to easily access sub-bins,
settings, and even effects. You find yourself accessing the super bin
often and thanking Avid for creating it.
As you go through each setting
you will find that you can configure just about everything in XDV 3.5.
You will be much happier if you get this over with first, as you will
become familiar with the program by doing it and will have your workspace
and workflow set just to your liking. You can configure things like
launching the last project you worked on upon the launch of the software,
setting up button styles and global workspace colors, specify your encoding
and output settings, map functions to the keyboard, and as I said before
just about everything else.
Interface
The Avid interface is extremely customizable, almost to its detriment.
I was overwhelmed on the number of colors and buttons styles that I
could choose from. Each window in an XDV 3.5 mode is customizable. While
this is nice and the ability to customize window colors and button styles
was relatively easy, I wish that Avid would have had pre-selected templates
to choose from, simplifying the task.
XDV 3.5 let’s you take
each window and move it around to the desired area on your screen. You
can even save the layout as a workspace so XDV will always remember
it, making it easier to set-up your workflow. I did find this task of
arranging windows to be tedious. The windows did not snap to each other
as easily as I would have liked. I also think that Avid should add the
similar windows options of cascading or tiling sub-windows in the work
area. Though, I can not complain too much here, once I achieved my desired
workspace, I did not have to keep changing every time I launched the
application.
Recording
Shots
Jumping right in, I immediately wanted to start digitizing some shots.
To hold true to what I believe many desktop DV editors use for a deck,
I used a DV Camera, a Canon ZR 3 as my deck. Unfortunately, Express
DV 3.5 did not recognize my camera when I went to set-up my deck, forcing
me to initially choose a generic configuration. I found that this was
troublesome as I started to log clips. The camera would consistently
have a slow reaction time to commands and would occasionally completely
miss a mark.  This
was easily corrected when I decided to find the nearest configuration
option and pick that instead. Otherwise, the actual logging of clips
is easy and straightforward. You can name a clip, mark the I/O spots
and digitize as you go or log the whole tape and batch import later.
As your logging clips you can add notes to help during editing at the
same time. I also liked the Bin that all clips are placed into. You
are able to view the bin in brief, text, frame, or script mode, allowing
you to customize the system to your workflow. I imported 45 clips in
one batch with no headaches, which is great because it let me walk away
from the computer and do something else. This
was easily corrected when I decided to find the nearest configuration
option and pick that instead. Otherwise, the actual logging of clips
is easy and straightforward. You can name a clip, mark the I/O spots
and digitize as you go or log the whole tape and batch import later.
As your logging clips you can add notes to help during editing at the
same time. I also liked the Bin that all clips are placed into. You
are able to view the bin in brief, text, frame, or script mode, allowing
you to customize the system to your workflow. I imported 45 clips in
one batch with no headaches, which is great because it let me walk away
from the computer and do something else.
Editing
Sequences
Depending on who you are and what type of editing experience you have,
you will either love or struggle with XDV 3.5’s editing mode.
If you’re an experienced Avid user, XDV will seem very similar
to you. You can even import keyboard setting files from other Avid systems
to ensure your editing environment is the same. An experienced editor
will be able to jump right into the system and will quickly pick up
on XDV 3.5’s keyboard layout. You can custom map functions in
Avid to specific keys, giving full control of how you want to edit.
This feature is extremely valuable if you like to edit using a mouse
and keyboard. By clustering groups of functions on the keyboard, splitting
your hands between the mouse and keyboard become very easy. All the
basic keystrokes are in place in XDV 3.5 such as J-K-L and I-O, you
can use the up and down arrow keys to quickly zoom in and out of the
timeline, and there is every possible key combination to accomplish
every function in XDV 3.5.
 One
of my favorite functions in the edit mode is the undo function. If you’re
like me, you are constantly hitting CTRL-Z or CTRL-R to undo/redo actions.
While Avid provided 99 layers of undo, what is even better is that Avid
has an undo/redo list that shows you specifically which actions you
are undoing/redoing. This is invaluable as your trying to figure out
the exact spot to make a cut or place an effect. One
of my favorite functions in the edit mode is the undo function. If you’re
like me, you are constantly hitting CTRL-Z or CTRL-R to undo/redo actions.
While Avid provided 99 layers of undo, what is even better is that Avid
has an undo/redo list that shows you specifically which actions you
are undoing/redoing. This is invaluable as your trying to figure out
the exact spot to make a cut or place an effect.
Dragging and dropping clips into the edit mode is quiet easy. You can
select a clip and drag it into the timeline to create a new sequence
or into the on screen monitor to edit the clip as is. One frustration
is that when trying to add a clip into an existing sequence, you have
to set-up a key frame, or mark an in or out spot to accurately cut in
the new clip. It would be nice to be able to simply drag the clip in
and have the system automatically shift everything to accommodate the
new clip.
Using the trim mode, stepping
forward or back, and marking a sequence was very easy. One feature I
would love to see is the ability to mark a clip and instantly trim it
with the click of a button. Instead I had to lift or cut the marked
segment and create a new sequence to drop it into. If there is an easier
way to do this, than I hope Avid can tell me. On the upside, if you
are cutting in a lot of tracks and you purchased Avid’s PowerPack
for XDV 3.5, you will be able to take advantage of their dupe deletion
function. This function will automatically delete duplicate scenes in
your sequence. For long-form pieces, this will come in very handy.
 Color
Correction Color
Correction
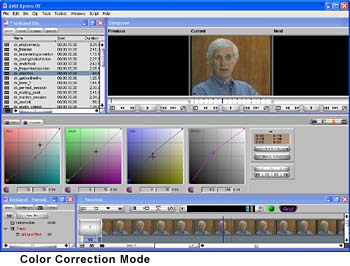
One of the biggest features that Avid pushed was their more robust color
correction feature. I must say, Avid hit the mark on this one. Using
the color correction feature was easy. XDV 3.5 provides its own mode
for color correction, which allows you to control color using Hue Lightness-Saturation
(HLS) Color whiles for highlights, mid-tones, and shadows. Combining
the HLS controls with Color Curves for RGB and Master levels, XDV 3.5
provides a superior color correction tool. In the color correction mode,
you are able to see the previous, current, and next shot in a 3-paned
window. This allows you to take advantage of natural matching tool.
Using and eyedropper tool, you can quickly match skin tones from one
shot to the next, ensuring even color/exposure throughout the sequence.
Finally, if your editing a long-format piece, you can set up color templates.
These templates can easily be applied across multiple tracks at a time
allowing the editor to ensure consistent color/exposure throughout their
piece. If you are outputting your video back to tape, the edit in safe
mode is very helpful. It will alert you when you start pushing the limits
of broadcast standards.
Audio
XDV 3.5 comes with a nice set of audio tools. From the gain automation
to EQ tools, XDV 3.5 gives the editor solid control over the audio tracks.
Even during the record mode, you can select which audio track you want
to record from. You are able to set in and out marks and edit the sound
quality ‘real-time’ using the gain automation function.
You can edit up to 8 tracks of audio at a time. Digging into the EQ
tools, you will find a series of EQ templates that allow you to boost
music, specify a voice preference (i.e. Male or Female), filter tape
hiss, etc. You can even make your own EQ templates. I found these EQ
templates very helpful on the very first video clip I edited, as I was
quickly able to edit out tape hiss and then switch to the automation
gain tool to boost the sound during low spots.
Outputting your final piece
is quiet simple. XDV 3.5 allows you to export your clips directly into
another Avid system, export them as OMF, MPEG, AVI, AAF, or QuickTime.
You can also send clips directly to compression software, for example
Discreet’s Cleaner application. This function came in handy as
I was exporting 13 clips into Cleaner so I could compress them for viewing
over the web. The only frustration I had here is that after each clip
was sent to Cleaner, I had to hit return to specify where the next clip
was to be saved.
One down-side to XDV’s
audio tools, is its J-K-L audio scrubbing. It is slow and jumpy for
the most part. XDV only renders audio at 3 times per second in scrubbing
mode. This makes it difficult to decipher key words and hear the base
levels. You can also only scrub two tracks at a time, which can become
frustrating. I found it easier to avoid scrubbing all together and just
using the slipping and sliding functionality instead.
Overall, Avid Express DV
3.5 is a solid desktop DV editing tool. It will certainly give Final
Cut Pro a run for its money. If your looking for a professionally based
tool, or are an existing Avid user or desire to become an Avid editor,
this product is for you. Experienced editors will like XDV 3.5’s
customization capabilities, color correction tools, and audio editing
tools. If your switching from Final Cut Pro to XDV 3.5 you may miss
some of the more computer centric functions and layouts that Final Cut
Pro provides. However, I believe over the long run, Avid will provide
you with a great tool set to meet your editing needs.
Pros
Solid cross-platform editing tool. Incredible color correction functionality.
Good audio editing suite. Overall value for its feature set is high
for its price point.
Cons
High learning curve. Tweaking of the interface can be tedious. Customizing
settings is a lengthy process.
Bottom Line
The application was very stable (it did not crash once on my PC or the
Mac I had it installed on). The feature set is rich and the flexibility
of the application is very powerful. This application will be hard to
beat and is a definite buy for the serious DV editor.
Price
Base Avid Express DV 3.5: $1,699
With Avid Express DV 3.5 Power Pack: $2,499
© 2002 Marc Kermisch
marc@kermisch.com
|